Showing posts with label watsons. Show all posts

Tuesday, May 3, 2016

iWhite BB.Holic Everyday BB Cream: Review

iWhite is getting a lot of hype these days, especially after they revamped their packaging and beauty bloggers/vloggers started raving about their products. This was so apparent with their Aqua Moisturizer, which is a big hit to most people. I've also tried that product before but I will save my review for that in a later post. Today, we are going to be talking about their newly released bb cream.


The BB Cream is called BB.Holic. It has been in the market for quite some time now but I think it is not yet available nationwide as I still haven't seen this particular product in local drugstores and supermarkets near my place. I had to go grab one when I dropped by SM Makati, just to be able to try this one. This explains why I wasn't able to review this product early on.

Saturday, April 16, 2016

Belo Perfecting Shield Tinted Sunscreen: Review

Recently, I have been neglecting my blog over youtube because I have been more into watching than reading. Lately, I have been obsessed with watching and doing first impressions review. While watching PinayBeautyandStyle Lover's channel, I chanced upon her first impressions review of the Belo BB Cream (or was it the Tinted Sunscreen?).


She mentioned that Sample Room had available samples of the product when she last checked. It served as a good reminder for me to check what's new in Sample Room. After all, it has been a while since my last visit to the website. Upon checking, I found out that there were a little over a hundred samples of the new tinted sunscreen from Belo. I immediately checked the amount of points I had and fortunately, I had enough. Hence, I took the chance and got one.

Thursday, March 31, 2016

Pretty Secret Black Detox Mask (Charcoal, Honey): Review

It has been a while since I sat down and wrote a blog post. Lately, I have been too focused on my youtube channel that I have ended up neglecting my blog. Today, I decided to give my blog some attention and create a blog post regarding a product that I highly recommend.


While looking at new items in Watsons, I chanced upon this black detox mask sheet. It wasn't available in the Watsons in my area so I was really surprised to see this on the rack. (I got this in Watsons Salcedo Street, Makati City.) I have been looking for black detox mask sheets ever since it was featured by some of my favorite Korean youtubers. 

Tuesday, March 22, 2016

EB Advance Supreme Lipstick (Purples): Review

If you're active enough on instagram (or if you just follow me @theannaluisa), then you probably have already come across the hashtag #CanYouPullOffPurple. It's something that's been out for a few months now ever since Ever Bilena and EB Advance announced that they will be launching new lipstick shades for their collections. And yes, you guessed it right. Everything's purple!  In today's post, I will be featuring the newest EB Advance Supreme Lipsticks in different shades (and finishes) of purple.

WARNING: This post is picture heavy.


Saturday, February 6, 2016

Marionnaud Natural Cellulose Cleansing Sponges: Review

I've got to be honest. Rather than spending my money buying Clairsonic or other cleansers of the sort, I'd rather buy quality skin care items and use a cheaper alternative that does the job. But really, I don't have the funds for it so I tried this out on a whim. Fortunately, this trial turned into a great discovery, which is why I'm sharing it with you.


Sunday, January 24, 2016

Biore UV Aqua Rich Watery Essence with BB: Review

Last December, I got a surprise package from the good people of Vibelle Corporation. I wasn't expecting anything from anyone so imagine my surprise when I saw a parcel addressed to me arrive. When I finally opened the package, I was extremely happy to see this goodness.


Friday, January 22, 2016

iWhite Korea 2 Minute Whitening Miracle: Review

I noticed that a lot of beauty bloggers and youtubers have been going on about this iWhite 2 Minute Whitening Miracle and although I wanted to jump in on the bandwagon sooner, I couldn't find this particular product in the nearby supermarket and Watsons in my area. Last month, I dropped by Megamall to get my prizes from a video contest I joined and I chanced upon this product in the beauty section of SM Department Store.


Wednesday, January 13, 2016

Fashion 21 All Day (Russet) Matte Lipstick: Review

I have another lipstick review for you. Are you excited? Well, I am! Today's lipstick review is going to be on the Fashion 21 All Day Matte Lipstick and I got it in the shade of All Day Russet. I initially saw this on purpleheiress youtube channel and I originally wanted to purchase the All Day Bronze shade. However, it was sold out so I couldn't grab a hold of it.


This lipstick is very affordable at only PHP 175.00 and it is available in SM Department stores. I got mine in SM Sta. Rosa and out of all the shades available, I found All Day Russet to be the best.

Thursday, December 24, 2015

EB Advance Liquid Lipstick: Review + Swatches

Before anything else, I would love to greet you all a Merry Christmas! Today marks a really exciting day in the calendar. Well, at least for me it is. Aside from it being Christmas eve, it is also one of my closest friend's birthday. So in line with that, let me take this opportunity to greet her. Happy Birthday Lyle! I will be dropping by to visit you later. ;)

Enough with the greetings, let us now move on to the review proper. Let me be real with you. I've never been more excited with a release of a specific local product than now. Ever since Ever Bilena posted a photo of their liquid lipsticks, I've been going back and forth to the nearest Watsons and Ever Bilena counters to check if they already have it and it was only until last weekend when I saw them.

Saturday, October 24, 2015

Nichido Color Eyes Mascara and Eyeliner Duo: Review

Before I turn  this laptop off, I thought I should write a post first. It's been a while and I'd be lying if I told you I don't miss blogging. I don't have a laptop of my own. It broke. Me sad. I'm just borrowing my mom's for the mean time and I'm hoping to get a new one as early as I can. Hopefully soon.

In today's post, I will be talking about a local product that I have been using non-stop over the past couple of months. As pictured below, I got it on sale for only PHP168 at Watsons. It is a 2 in 1 product that saves a lot of space in my makeup bag, a mascara and eyeliner in one!

Wednesday, April 22, 2015

Shawill Lipstick Color Gorgeous (#001): Review

Hi guys! I guess it's been a while since I talked about a local lip product. Today, I'm going to be talking about a lip color from the brand called Shawill. I got this from Watsons and it is a good everyday lip color that only costs PHP188. I got this over a year ago and it got pushed at the very back of my makeup stash that I ended up forgetting about it. Good thing the product has an expiration date and I was happy to find out it wont expire until August 2017. It was also a good thing that I decided to thoroughly look at my makeup collection for some items I may have missed out on.


If you've been following me on instagram, you may have seen the swatch of this product. It was love at first swatch. It reminded me of my Etude House Look at My Lips Lipstick in Ladylike Pink. That was one of my ultimate favorite lip colors and I was happy to find that this shade is similar to that.

Friday, August 15, 2014

Chromastix Hair Chalk Neons: Review


I don't know about you but something that I've always wanted to do but never had the guts to do so is to color my hair with bold colors like blue and pink. No, I'm not trying to be rebellious or anything but ever since the ombre trend surfaced all over, I've always been curious as to how I would look like if I had a nice ombre with a bright color.

Thankfully, I don't have to dye my hair permanently just to try it out. I mean, even if I had the chance, I probably wouldn't permanently dye my hair with those colors. No offense to people who sports bright colored hair though. I think you, guys, are cool for having enough confidence to rock them. (The only reason why I wouldn't go for it is because I don't have the courage to do so.)


It's been a year since I found out about hair chalks and I've always been curious about the product but I never got one for myself just because back then, only BYS had hair chalks in my local drugstore and they never stock on the color I want (which is pink) so I never bought one. I know Tony Moly has one but during that time, the hair chalk line wasn't released in the Philippines yet.

A few days before my birthday, however, I came across this very affordable hair chalk set from Chromastix. I thought I overcame my urge to buy a hair chalk but when I looked at the price, I was so surprised to see that it was fairly cheap at PHP99.


And so I looked through the collection of colors and I noticed that this particular set had all the Red Velvet (K-Pop girl group) hair colors in it which are green, orange, blue and pink. This pushed me to buy the product so I can do a hair and make-up tutorial for their debut song called "Happiness".


 I love all the colors in this set: green, orange, blue, purple, yellow and pink

Instructions 

To view how I used the hair chalk, I made a short tutorial on my youtube channel. It's in my Red Velvet Happines Hair and Makeup Look video. Just click the click to open the said video. For your reference, the demo starts at around the 3:14 mark.

Honestly, the hair chalk didn't do as well as I thought it would. It wasn't as pigmented as the other brands I've seen over the internet but it still works and I guess for the price, I really can't complain.

 A photo of me with the hair chalk on the ends of my hair. I used the blue one.

Just a reminder to everyone who's thinking of using this product, make sure to wear a shirt that you don't really care for while coloring your hair because it transfers onto clothing materials really easily. The good news is that it washes off quickly too. I just wouldn't want you to ruin the very same shirt/ dress that you were planning to wear outside so I suggest you wear a temporary top prior to using this.

Apparently, I broke the blue one while using it. Haha.

So would I recommend it? Yes, sure! I don't see any reason why one should not try it. I think it's fun and a very affordable way to try out a new look, or shall I say new hair color. :)
with love, Anna Luisa

Saturday, July 12, 2014

In2It Waterproof Gel Liner (Very Black): Review + Eyeliner for Beginners (Tips)


Before I go on with the formal content of this post, I would like to invite everyone to join my ongoing giveaway. I will be giving away a hair dye from the Japanese brand called Dariya Palty in the shade Milk Tea Brown, which happens to be one of the popular shades they have. It is open internationally so everyone is encouraged to join. :) (You will probably see this introduction in most of my future posts up until the giveaway is over. I hope you don't mind the post by post plug. ^^)

One of the questions I usually encounter from friends who recently come to realize their fascination with makeup is how to line the eyes. My initial reaction? Which part? Are you talking about lining the waterline, tightlining or lining the upper lash line? What type of lining technique do you want to achieve? Do you want a droopy eye, a cat eye or just simple definition of your natural lash line? The possibilities when it comes to lining eyes in general are varied that is why it is very hard for me to come up with just a short answer.


Product Used: Dolly Wink Liquid Eyeliner

For one, we all have different eye shapes. Different eye shapes have different lining styles that compliment them. Two, I'm not an expert at this field. I don't really consider myself as an expert at any kind of makeup. I mainly just view myself as an enthusiast. So ultimately, I have a lot of knowledge regarding cosmetics but all the knowledge I have are things that I've just acquired over years of inquiring and researching. I've never received professional training so I guess I can say that the technique I use is that of a beginner. I say this because I want to warn you beforehand. And I want to repeat this for emphasis-- I am not a makeup expert. But then again, if you're interested to know what this novice has to say, then by all means, continue reading. :)

I can still remember the time when I first got curious with the concept of lining the eyes. I didn't know anything. I was watching tutorials on youtube and was fascinated by the different ways and different kinds of liners one may choose to apply them. Back then, I only knew of how to line my waterline. Fortunately, I was never the type of person to be afraid of getting poked by eyeliners. Hence, ever since I was a young girl, whenever my mom would do my makeup (for special occassions), I would be the one to personally line my waterline. My mom just had to show me how to do it once and I was able to follow. So for a tip, I should say that for you to successfully line your waterline, you must have a steady hand and a brave heart. Of course, a good waterproof eyeliner would prove to be helpful as well. But if you really can't stand 'pointy' things near your eyes, then don't push it. There are a lot more ways to line your eyes that would be more appropriate for you.

The next technique I was able to master was the art of lining my upper lash line. To be honest, it took me a long period of trial and error before I actually felt like I was already doing a good job. And frankly, there are still days when I feel like my eyeliner application just looks like a mess. The only tip I can give you is to continuously practice. Remember that most people do not master this technique in just a week or two. Take me for example. It took me months and months before I got the hang of lining my upper lash line. So if it didn't work out the first time, don't be discouraged. Just try again and eventually, you will find the stroke that is most comfortable and convenient for you.

Tightlining is a different technique as it requires you to touch your upper waterline which is pretty hard at first and would most probably tear you up. But thanks to TheMakeupChair, I found the easiest way to line your upper waterline! I'm not sure if it will work for you but it definitely did for me. Here's a video of me doing the technique so you can easily understand how just a simple method of closing your eyelids would turn this chore into a habit (link). 

Personally, I was able to master these techniques by using pencil eyeliners first. The shape of it is what made me choose this as a beginner tool because it's very sturdy and I feel in control. I suggest you explore different kinds of eyeliners and choose the one that you feel most comfortable with. I have friends who learned it by using an angled brush and a gel liner first, so really, it's all about your own preference.

Also, I don't jump from one kind of eyeliner to another. I don't practice them all at the same time. I first focused on pencil liners, followed by gel liners then liquid liner. When I first mastered applying eyeliner on my upper lash line with the use of kohl pencil, I found it easiest to transition to gel liner by simply lining my lash line with it first then tracing it or topping it off with gel liner afterwards. Through this, I developed my gel liner skills and was able to apply them without the kohl pencil as a mark underneath. I followed the same trend in learning how to apply the liquid liner. You can also try to make use of this technique but again, if you don't feel comfortable doing all this work, don't push it. Just stick to a technique that, you guessed it, keeps you at ease.

There is no single way of telling you how you should learn eye lining. It is for you to discover on your own. Just make sure to practice, practice, and did I say practice? You will eventually learn by repitition. Don't stress over it so much and definitely don't give up half way.

Now let me take this opportunity to share with you a product that you might be interested in. This is a good product especially for those who are most comfortable with using pencil type eyeliners. It's a gel liner packaged as pencil type! It combines the ease of use of pencil type eyeliners and the opaque and creamy formula of gel liners! The best part is it's waterproof so it's perfect to be used for lining the waterline and tightlining.
 

The product is called the In2It Waterproof Gel Liner in the shade WG01 Very Black. The first thing I noticed was the packaging. I really like the design that's printed all over the pencil. The flowers make the pencil look girly, which I like. It has a cap to cover the tip and protect it from getting chipped.


It also comes with a sharper that is very useful. I find that when I use a different sharperner for this product, there is a higher chance that the tip would just simply break off. It also has a cleaning stick at the back to remove pencil residue in between the blades (not pictured, sorry).


It claims to be waterproof and long wearing, which I can attest to. It also claims to not smudge and helps avoid panda eyes. I wouldn't necessarily say it's totally smudge proof but comparatively, this eyeliner withstands smudging, running and bleeding better than other eyeliners out there. It dries and sets after a couple of seconds. I personally don't really time it so I'm not sure if the 60 second claim is true. I feel like it dries sooner than that.

True to its shade name, this eyeliner is "very black".


It is super creamy and easy to apply. I really like this product and I got it for PHP 379.75 at Watsons in SM Makati. If you're transitioning from pencil liners to gel liners, or maybe you're just finding it hard to work with angled brush and the typical gel liner in a jar, then this might be the answer to your problems! I highly recommend it.

I hope this post has helped you in one way or another. If you have other tips or stories to share, please don't hesitate to comment down below as I'm sure many people reading this would appreciate it.

I'm sorry this post turned out to be lengthy. Mian~
with love, Anna Luisa

Monday, June 2, 2014

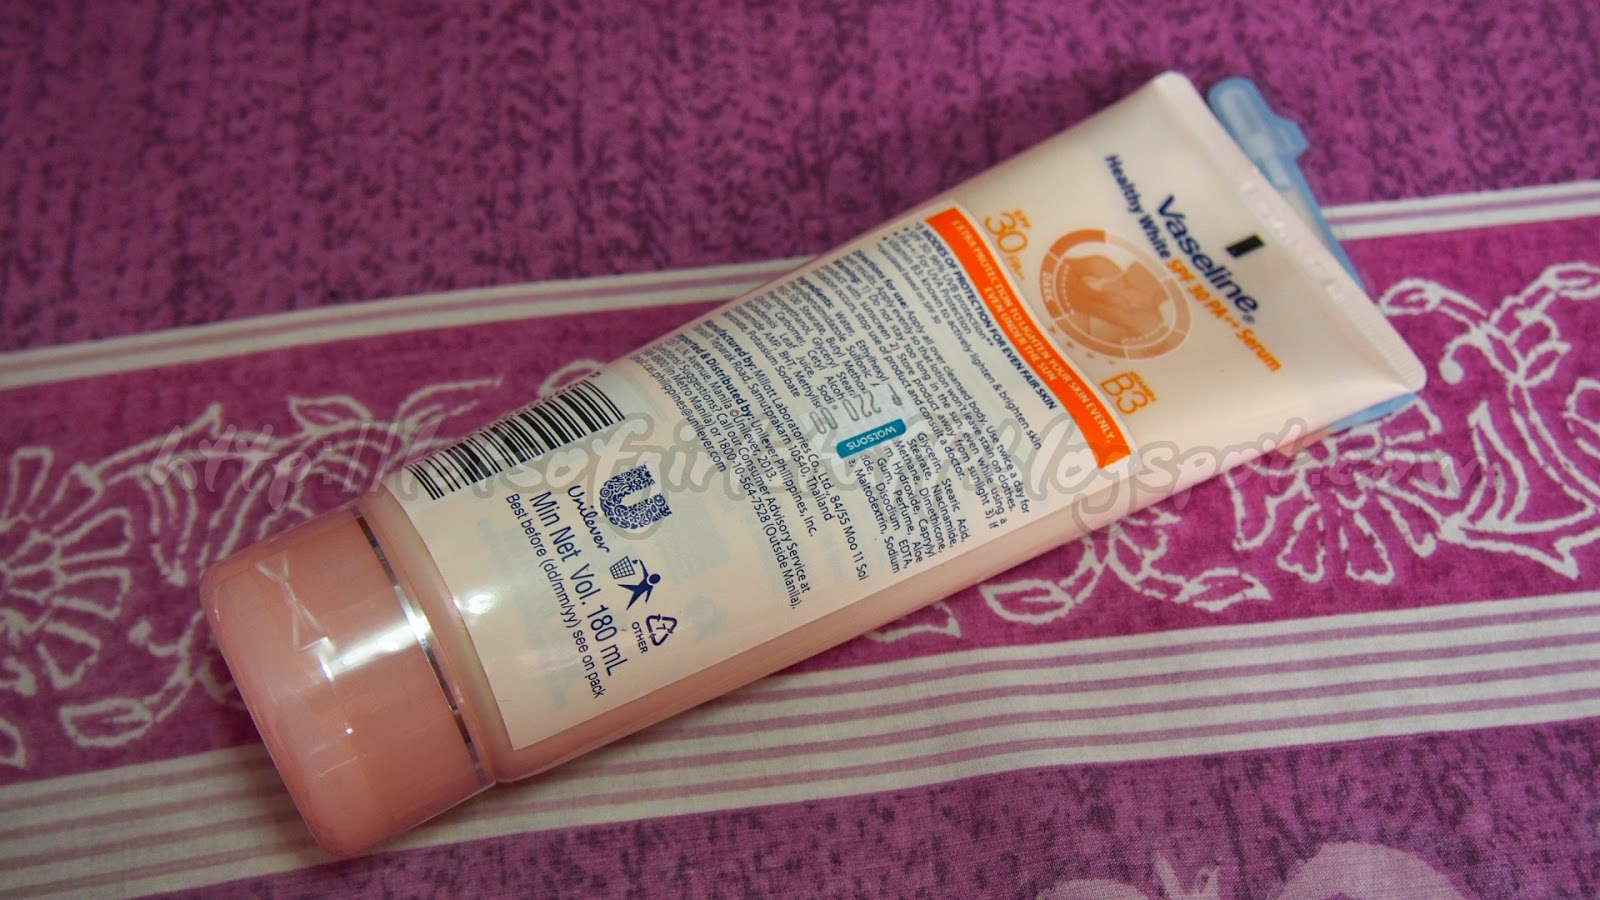
Vaseline Healthy White Serum SPF 30++: Review


It doesn't take a scientist to know the harmful effects of UVA and UVB from prolonged sun exposure. It is also not a secret that before going out of the house and getting exposed with the sun's harmful rays, one must arm him/herself with protection. And yes, I am talking about sunscreen.


 The product is priced at PHP220 and I bought this from Watsons. Oh, and it contains 180ml. :)

This rule must be strictly followed especially in a country where whitening products are well advertised and used by the community. But then again, even without using whitening products, one cannot deny that sunscreen has become a necessity these days. It's a good thing there are moisturizing products that contains SPF and PA protection such as Vaseline lotions, or it successor, the 'serum'.

Introducing Vaseline’s most intensive whitening product yet: Vaseline Healthy White Serum SPF 30 PA++. It has more concentrated Vitamin B3 formula that whitens 3x more than regular whitening lotion. Has UVA and UVB protection against the sun.-- Sample Room
It's not my first time using Vaseline lotions, let alone the Healthy White line. In fact, I may have written a post for this specific line at least once before (over here).

Now, I don't really see the difference between the serum and the lotion despite the fact that the saleslady told me the serum is absorbed quicker than the other variants. This is, however, not a tested claim on my part since I don't have both the lotion and serum with me so there's really no way for me to compare and contrast. Thus, I provided you with a bit of a description of this new product, italicized two paragraphs above and well indented just to give it more emphasis. If you ask me, however, it just felt like a normal lotion. On the other hand, it is an undeniably comforting fact, that that the product has SPF 30 and PA++. There's this sense of relief whenever I sense the sun's heat emitting its effects on the surface of my skin. And before I forget to mention, there's also a little satisfaction that the packaging is something that I prefer over the previous ones. The cap is at the bottom, which makes storing an actual preparation for the product to move down into the opening by force of gravity. Also, the body is made of a material that's a lot easier to squeeze so I can imagine it would be a lot easier to empty out.

Moving on, its whitening properties aren't something that I really took note of. I didn't see any whitening effects, which is something that I didn't actually expect. I mean, I don't remember having any from the previous variants so I guess I was a little bit prejudiced. So in a way, I still wasn't disappointed.

So let me give an advice before I conclude this  post. Make sure to get one of these. Rainy days are ahead but our battle with the sun doesn't stop just because the sky decided to drop us a few bits of water every once in a while.
with love, Anna Luisa