Showing posts with label philippines. Show all posts

Wednesday, January 21, 2015

Sophie Lipstick (Ice Pink/ SLPK01): Review + Swatch Comparison

Lately, my posts have been mostly skin care related so I decided to squeeze in a makeup review for a small change. Actually, this post is something that I actually planned to make  more than six months ago but due to a lot of backlogs, this has been pushed back until today.

Last March 2014, I joined Real Asian Beauty (Kristine)'s Meet and Greet in SM Aura. Kristine has always been one of my favorite Filipina bloggers/youtubers so when I came across an opportunity to meet her, I grabbed it. During the meet up, she gave us small gifts as token of appreciation for our support and it included a Sophie Lipstick. (Isn't she the sweetest?) I got the shade SLPK01 or Ice Pink, which I will be reviewing today.

 Simple black packaging with pink details and print
Expiration date is printed on the shade sticker

Wednesday, November 5, 2014

Olay Natural White Healthy Fairness Body Bar


It comes as no surprise that many Asian countries prefer fairer looking skin and Philippines is definitely not an exception. The trend has been around for such a long time and it is here to stay. In fact, out of all my blog posts, my most commented and viewed entry would have to be on a whitening product which just proves the desire of Filipinas to get lighter skin.


There are so many skin lightening options out in the market these days but I've only been comfortable with using whitening soaps. The problem is, there's a huge selection of brands out there so choosing one out of the many could be a chore. Also, most whitening soaps have strong chemicals that causes redness, peeling patches and sometimes itchiness.

Tuesday, October 7, 2014

Gluta-C Skin Whitening Gel: Review


Not everyone has a problem with uneven skin tone but I do. Especially on my elbows and underarms. My elbows are a little bit dark. I don't know why but ever since the world began (Okay, so this is an exaggeration.), I've noticed that I have quite dark elbows. My underarms, however, isn't actually dark but the color is uneven so it also bothers me a lot. The culprit could be constant shaving for years. But whatever confirmed reason there is for these problems, at the end of the day, what matters is how I handle it.


After going through different blogs out there, I found out about this Gluta-C Underarm and Bikini Skin Whitening Gel. There were a lot of raves for this product as a lot of people had positive remarks on this item.

Saturday, July 12, 2014

In2It Waterproof Gel Liner (Very Black): Review + Eyeliner for Beginners (Tips)


Before I go on with the formal content of this post, I would like to invite everyone to join my ongoing giveaway. I will be giving away a hair dye from the Japanese brand called Dariya Palty in the shade Milk Tea Brown, which happens to be one of the popular shades they have. It is open internationally so everyone is encouraged to join. :) (You will probably see this introduction in most of my future posts up until the giveaway is over. I hope you don't mind the post by post plug. ^^)

One of the questions I usually encounter from friends who recently come to realize their fascination with makeup is how to line the eyes. My initial reaction? Which part? Are you talking about lining the waterline, tightlining or lining the upper lash line? What type of lining technique do you want to achieve? Do you want a droopy eye, a cat eye or just simple definition of your natural lash line? The possibilities when it comes to lining eyes in general are varied that is why it is very hard for me to come up with just a short answer.


Product Used: Dolly Wink Liquid Eyeliner

For one, we all have different eye shapes. Different eye shapes have different lining styles that compliment them. Two, I'm not an expert at this field. I don't really consider myself as an expert at any kind of makeup. I mainly just view myself as an enthusiast. So ultimately, I have a lot of knowledge regarding cosmetics but all the knowledge I have are things that I've just acquired over years of inquiring and researching. I've never received professional training so I guess I can say that the technique I use is that of a beginner. I say this because I want to warn you beforehand. And I want to repeat this for emphasis-- I am not a makeup expert. But then again, if you're interested to know what this novice has to say, then by all means, continue reading. :)

I can still remember the time when I first got curious with the concept of lining the eyes. I didn't know anything. I was watching tutorials on youtube and was fascinated by the different ways and different kinds of liners one may choose to apply them. Back then, I only knew of how to line my waterline. Fortunately, I was never the type of person to be afraid of getting poked by eyeliners. Hence, ever since I was a young girl, whenever my mom would do my makeup (for special occassions), I would be the one to personally line my waterline. My mom just had to show me how to do it once and I was able to follow. So for a tip, I should say that for you to successfully line your waterline, you must have a steady hand and a brave heart. Of course, a good waterproof eyeliner would prove to be helpful as well. But if you really can't stand 'pointy' things near your eyes, then don't push it. There are a lot more ways to line your eyes that would be more appropriate for you.

The next technique I was able to master was the art of lining my upper lash line. To be honest, it took me a long period of trial and error before I actually felt like I was already doing a good job. And frankly, there are still days when I feel like my eyeliner application just looks like a mess. The only tip I can give you is to continuously practice. Remember that most people do not master this technique in just a week or two. Take me for example. It took me months and months before I got the hang of lining my upper lash line. So if it didn't work out the first time, don't be discouraged. Just try again and eventually, you will find the stroke that is most comfortable and convenient for you.

Tightlining is a different technique as it requires you to touch your upper waterline which is pretty hard at first and would most probably tear you up. But thanks to TheMakeupChair, I found the easiest way to line your upper waterline! I'm not sure if it will work for you but it definitely did for me. Here's a video of me doing the technique so you can easily understand how just a simple method of closing your eyelids would turn this chore into a habit (link). 

Personally, I was able to master these techniques by using pencil eyeliners first. The shape of it is what made me choose this as a beginner tool because it's very sturdy and I feel in control. I suggest you explore different kinds of eyeliners and choose the one that you feel most comfortable with. I have friends who learned it by using an angled brush and a gel liner first, so really, it's all about your own preference.

Also, I don't jump from one kind of eyeliner to another. I don't practice them all at the same time. I first focused on pencil liners, followed by gel liners then liquid liner. When I first mastered applying eyeliner on my upper lash line with the use of kohl pencil, I found it easiest to transition to gel liner by simply lining my lash line with it first then tracing it or topping it off with gel liner afterwards. Through this, I developed my gel liner skills and was able to apply them without the kohl pencil as a mark underneath. I followed the same trend in learning how to apply the liquid liner. You can also try to make use of this technique but again, if you don't feel comfortable doing all this work, don't push it. Just stick to a technique that, you guessed it, keeps you at ease.

There is no single way of telling you how you should learn eye lining. It is for you to discover on your own. Just make sure to practice, practice, and did I say practice? You will eventually learn by repitition. Don't stress over it so much and definitely don't give up half way.

Now let me take this opportunity to share with you a product that you might be interested in. This is a good product especially for those who are most comfortable with using pencil type eyeliners. It's a gel liner packaged as pencil type! It combines the ease of use of pencil type eyeliners and the opaque and creamy formula of gel liners! The best part is it's waterproof so it's perfect to be used for lining the waterline and tightlining.
 

The product is called the In2It Waterproof Gel Liner in the shade WG01 Very Black. The first thing I noticed was the packaging. I really like the design that's printed all over the pencil. The flowers make the pencil look girly, which I like. It has a cap to cover the tip and protect it from getting chipped.


It also comes with a sharper that is very useful. I find that when I use a different sharperner for this product, there is a higher chance that the tip would just simply break off. It also has a cleaning stick at the back to remove pencil residue in between the blades (not pictured, sorry).


It claims to be waterproof and long wearing, which I can attest to. It also claims to not smudge and helps avoid panda eyes. I wouldn't necessarily say it's totally smudge proof but comparatively, this eyeliner withstands smudging, running and bleeding better than other eyeliners out there. It dries and sets after a couple of seconds. I personally don't really time it so I'm not sure if the 60 second claim is true. I feel like it dries sooner than that.

True to its shade name, this eyeliner is "very black".


It is super creamy and easy to apply. I really like this product and I got it for PHP 379.75 at Watsons in SM Makati. If you're transitioning from pencil liners to gel liners, or maybe you're just finding it hard to work with angled brush and the typical gel liner in a jar, then this might be the answer to your problems! I highly recommend it.

I hope this post has helped you in one way or another. If you have other tips or stories to share, please don't hesitate to comment down below as I'm sure many people reading this would appreciate it.

I'm sorry this post turned out to be lengthy. Mian~
with love, Anna Luisa

Tuesday, July 1, 2014

Nichido Stardust Palette (Totally Neutral): Review


Before I go on with the formal content of this post, I would like to invite everyone to join my ongoing giveaway. I will be giving away a hair dye from the Japanese brand called Dariya Palty in the shade Milk Tea Brown, which happens to be one of the popular shades they have. It is open internationally so everyone is encouraged to join. :) (You will probably see this introduction in most of my future posts up until the giveaway is over. I hope you don't mind the post by post plug. ^^)


So I was going through my hard drive and I saw this folder containing 400+ photos of unreviewed items over the past year and my initial reaction was, 'Wow! What have I been doing last year?'. I definitely have more products to review than I originally imagined. I know I've been doing good lately as I've been blogging often (every other day) and taking advantage of my free time these days. But the amount of products to review is just overwhelming, I'm not even sure I will get to blog about all of them!

But enough about that talk, let us welcome the month of July by talking about one of the products I've purchased last year, to scratch off from that pile (of unreviewed items). Do note that the photos were taken using my old camera so the photos aren't as good as the recent ones but hopefully, these shots would make do.

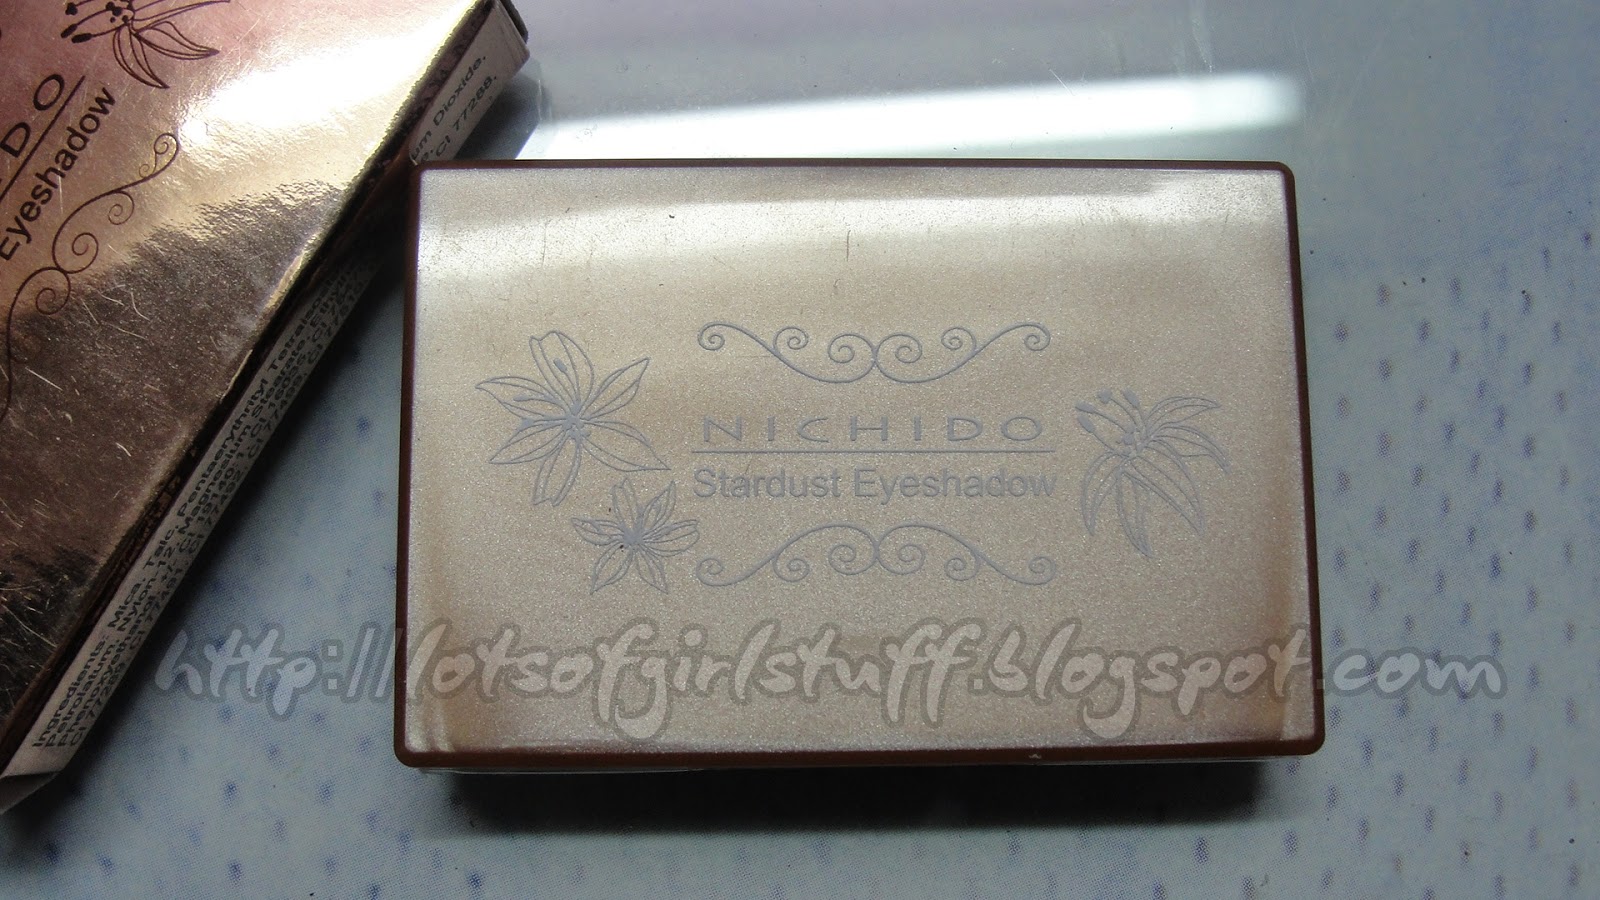
Plastic cover.
It had a 'Nichido' print on the shadow itself.
Just a closer look onto the shades.

So last year, I decided to do a makeup tutorial using local Filipino products only and I got this particular product from Nichido. It's their three-color eyeshadow palette called the Stardust Palette in the shade Totally Neutral. It contains three neutral (true to its name) everyday eyeshadow colors. It has a pale pink, a medium brown and a dark brown. All, when put together, creates a very lovely look.

Tried to do just show the swatches on my fingertips but the colors don't show up well.

Let me talk about each of the colors to give you more idea of the product. I will start off with the pale pink. The pale pink shadow is a nice color that I like to use to highlight my eyes. I often apply it under my brow bone and on my inner corners to brighten up the look. It is the lightest of the three and is also the least pigmented. I find that I really have to pack on the shadow for the color to hint its presence on my lid. It's especially harder when I use brushes so I like to use the foam applicator that came with the palette as it picks more of the product up.

In this swatch, the medium brown doesn't show up too much because frankly, the shade is a little close to my skin color.

The next shade I will be talking about is the medium brown. This is a really nice medium tone that I like to use on my crease area. It doesn't really create a loud eye contour effect, but more of a subtle shadow effect that I like to do especially when I (used to) go to work. At first, I didn't like the tone of the color on my lids but I eventually got used to it and it's now one of my favorite crease colors.


The last shade is the dark brown. This one is a really nice addition to the palette to provide your eyes with more definition, especially on your lash line/ outer V. It has a purple undertone so it looks a little bit purplish (Duh?) in some lighting. I received a lot of compliments regarding this particular shade when I first started using it. This is also the most pigmented of the three and my most favorite in the palette.

All three shades have hints of shimmer on the pan but doesn't appear sparkly when applied. When used all together, it creates a very neutral glamorous look. If you want to see how I usually use it, you can check out one of my old tutorials here:


The best thing about this product is that it is widely distributed all over the Philippines. I bought it from Watsons for only PHP168 so it definitely wouldn't hurt your budget. I highly recommend this especially for a neutral everyday makeup look.

with love, Anna Luisa

Wednesday, June 25, 2014

Ever Bilena Matte Lipstick in Viva: Review


Before I go on with the formal content of this post, I would like to invite everyone to join my ongoing giveaway. I will be giving away a hair dye from the Japanese brand called Dariya Palty in the shade Milk Tea Brown, which happens to be one of the popular shades they have. It is open internationally so everyone is encouraged to join. :) (You will probably see this introduction in most of my future posts up until the giveaway is over. I hope you don't mind the post by post plug. ^^)


 The shade is depicted on the cap so you don't have to do some guesswork.


So enough about my giveaway plug. Here's to the real deal! Ever Bilena matte lipstick has been in the market for years now and many Filipina beauty bloggers have already professed their love for this product. I wasn't much of a matte finish fan but since many people are swearing by this product, I decided to join the craze. A little too late, you might say. Well, this is actually not the first time I've tried this particular product. It was two years ago when I convinced myself to buy one. I got the shade Mauvey for its nice nude pink color. I was pretty satisfied with my purchase but I never got to review it.

Swatch taken with my old camera

A year ago, however, I decided to buy another one from the same line, but a different color. I chose Viva. Viva is a nice everyday pink color. With one swipe, it looks very natural, perfect for those days when you just want to look sweet and simple. It is buildable, though, to a brighter finish for when you want to make a subtle pop of color on your lips.


True to its name, it sets matte. This can either be a good or bad thing, depending on how you like your lips to be. As I've said, I'm not really a fan of matte finish lipsticks but it doesn't really matter to me because I can easily just top it off with a gloss if I want to.

On the other hand, something that bothers me is that it leaves my lips 'too dry' if I don't prep properly. To solve this, I always make it a point to apply lip balm prior to applying this product. It also doesn't have a long staying power but I really don't expect it to be at only PHP155.

In my opinion, I don't really see this as a product that I would rave about but rather a product that delivers to its expectations. I wouldn't necessarily recommend this as a must-have but I would say it's something that's nice to try. However, if you have an extra PHP155 in your wallet (or purse... or wherever you keep your money) and there's a Watsons store (or any other major department store) near you, then I don't see any reason why you shouldn't buy it. It has a wide selection of colors so I'm pretty sure you will get one that fits your style.

This particular product is a part of my Top 5 Summer/ Spring 2014 Lip Colors. Be sure to check out the other 4 in this post.
with love, Anna Luisa

Friday, June 13, 2014

Belo AcnePro and Hygienix (Sample Room): Review


Another Sample Room haul! Yay! I don't know about you but I always feel like a winner whenever I chance upon available samples that I like from the Sample Room website. For new readers out there who haven't read any of my Sample Room posts before, click on this link to enlighten you on what the site is all about.


Even after about more than a year of sampling, I only have limited amount of Sample Room points. How I wish I was a partner blogger or a VIP! But despite that, I am still able to get samples that are quite useful, not just for my blog content, but also for my day to day life.

My most recent snag before this was a cosmetic product, a lip product to be more exact, from the brand called Colour Collection. This time, however, I jumped on and tried this new skin care revolution from the brand Belo. I got both the face wash and toner. And with the little number of points I had remaining, I also got a handy dandy sanitizer spray from Hygienix, all included in just one shipping. Yay!


I was very excited to try this out as my previous post about Belo has got to be one of my most viewed posts. While I tried hard not to expect so much from the products (my previous review didn't exactly sing on a positive note), the promise of this bee venom technology that I only used to see in Korean skin care sets made me walk on blind faith. Without having any experience on any of the products from this line, I claimed that this product would be nothing but epic! I was convinced that this was the cheaper alternative to the organic skin care set I'm using or the dermatologist prescribed products I was using before. With many good reviews and being the editor's pick of the month (of Sample Room), I was very excited when the delivery man dropped this package off our doorstep.


I thought it was love at first use. I particularly liked the scent, the consistency and how it left my face after lathering/applying but my oh my, the disappointment it has caused in the form of acne. It started at the edges of my eyebrows and at first I thought it was the result of an unresolved hormonal imbalance from a previous monthly visit. But the more I used the product, the more pimples it creates. Yes, it does have a little bit of a calming effect-- to the person not on the zits! You see, the scent is just oh-so-divine. It's the perfect combination of powdery and flowery scent. I simply love it. But you know how they say "Sometimes love ain't enough."? I think I may have solved the mystery behind it by the use of this.

This product hates my face as much as I love its scent. While I would normally not give up after just a week of usage for a particular skin care set, I will make this an exception as I already had a not-so-good experience with the brand before. I don't want to linger on this set when I know my organic skin care takes better care of my skin.

To be fair, however, the line didn't dry up my skin. In fact, it left it soft and well moisturized. The only problem was it was causing more troubles than relief. And so I have decided to just let this go, just like Elsa's song. I passed both products (face wash and toner) onto my sister who offered to continue using it. If I get the chance to, then I might go back to this entry and update you guys with what happened to my sister's skin.

For now, I would say that this is a good product. A good product for someone else. For an acne prone, oily, sensitive skin person like me, I wouldn't recommend this as it broke me out like no tomorrow.


As for the sanitizer spray, I don't really have any complaints whatsoever. I like that it's compact, easy to use and gets its job done. Other than those, I have nothing more to say.

Have you noticed that most of my posts recently are skin care related? Haha. I'm not sure why but I have so much skin care stuff left for review. My next skin care post will be about a product that works well for cystic acne so be on the lookout for that! In the mean time, watch out for my next post, which will most probably be a makeup or hair product, just for a bit of a change.
with love, Anna Luisa

Wednesday, June 11, 2014

Nichido High Definition Lipstick (Pretty Tulip): Review + Swatches


Since I'm feeling a little lazy today, I won't be writing down a long post today. This will only be a short review plus swatches of one of my favorite lip colors these days. This was included in my Top 5 Summer/ Spring 2014 Lip Colors so you may have seen it at least once before, if you're a follower of my blog.


 Cute packaing, don't you think? :)

Poor swatches from my old camera.

The highlight of this post is a local Filipino product from the brand Nichido. It is called the High Definition Lipstick in the shade Pretty Tulip. I put this baby to good use over the past two months whenever I felt like going for a bold lip color and minimal eye makeup. I find that instead of red (which I consider to be the best for a bold lip color), pink or orange is better suited for warmer weather. This is not an absolute rule. It's just my opinion. You can wear red if you want to, of course!

So I've been constantly reaching out for this particular product for the most part of April and have been using it interchangeably with the Colour Collection Ultimate Wear Lipstick (Headturner) that I got from Sample Room. I like it a lot as it is has good color payoff. The shade is a very vibrant pink, perfect for a minimalistic makeup. You instantly glam up even with little to no eye makeup. I use this whenever I have an important event coming up with limited time for preparation.

 Poorly taken swatches are still swatches. Just deal with it. :p

It has a bit of a satin finish which I personally prefer. It tends to dry up after a couple of hours so I highly recommend that you prep your lips with a balm prior to using this. It transfers too so you have to reapply after you drink or eat. It's not a big deal though. Especially since it only costs PHP198.00 in Watsons!


It has a tinted lip balm strategically located at the cover cap that you can use to prep your lips. I rarely use this as I prefer using my Maybelline Baby Lips as base but I've tried it before and it does a pretty decent job of moisturizing your lips.

 This is not your ordinary color cap. It's a lip balm! ;)

The shade is almost always mistaken (by my family) to be the same as the other lipstick I mentioned above but just to be clear, I will provide a swatch side by side, below, just so you have a better idea. Nichido is a hot pink lip color with a little bit of coral undertone where as Colour Collection has a little bit of blue undertone.

 L: Colour Collection; R: Nichido
 See the difference?

For those of you who are looking for an affordable lip product in the hot pink family shade, I suggest you get this one and try it out! It works well, cheap and widely distributed all over the Philippines! Bili na! (Trans: "Buy it!")
with love, Anna Luisa